이 튜토리얼에서는 플러터 애플리케이션에서 부드럽고 동적인 전환 플로팅 액션 버튼 (FAB) 애니메이션을 만드는 방법을 살펴볼 것입니다. 목표는 TabBarView에서 선택한 탭에 따라 아이콘과 기능이 변경되는 FAB를 구현하는 것입니다. 이 튜토리얼을 마치면 탭 변경에 대한 시각적 피드백을 제공하여 사용자 경험을 향상시키는 애니메이션화된 FAB가 포함된 완전히 작동하는 앱을 보유하게 될 것입니다.
새로운 빈 앱
우선, 빈 플러터 애플리케이션을 만들고 material_symbols_icons 패키지를 추가하여 시작해 보겠습니다:
import 'package:flutter/material.dart';

void main() {
  runApp(const MainApp());
}

class MainApp extends StatelessWidget {
  const MainApp({Key? key});

  @override
  Widget build(BuildContext context) {
    return const MaterialApp(
      home: Scaffold(
        body: Center(
          child: Text('Hello World!'),
        ),
      ),
    );
  }
}
그럼 이제 HomeScreen을 새 파일로 리팩터링하고 StatefulWidget으로 만들어 보겠습니다.
import 'package:flutter/material.dart';
import 'package:material_symbols_icons/symbols.dart';

class HomeScreen extends StatefulWidget {
  const HomeScreen({super.key});

  @override
  State<HomeScreen> createState() => _HomeScreenState();
}

class _HomeScreenState extends State<HomeScreen> with SingleTickerProviderStateMixin {

  @override
  Widget build(BuildContext context) {
    return Scaffold(
      body: Center(
        child: Text('Hello World!'),
      ),
    );
  }
}
여기저기 탭 추가하기
이제 AppBar의 bottom 속성에 TabBar와 TabBarView를 추가해 보겠습니다.
@override
Widget build(BuildContext context) {
  return Scaffold(
    appBar: AppBar(
      title: const Text('Home'),
      bottom: TabBar(
        tabs: const [
          Tab(icon: Icon(Symbols.bolt), text: 'Tab 1'),
          Tab(icon: Icon(Symbols.flutter), text: 'Tab 2'),
          Tab(icon: Icon(Symbols.favorite), text: 'Tab 3'),
        ],
      ),
    ),
    body: TabBarView(
      children: [
        for (final int c in counters)
          Center(
            child: Text(
              'You pressed the button $c times in this tab',
              style: Theme.of(context).textTheme.titleLarge,
            ),
          ),
      ],
    ),
    floatingActionButton: FloatingActionButton(
      onPressed: () => setState(() => counters[0]++),
      child: const Icon(Symbols.add),
    ),
  );
}
TabBar은 사용 가능한 탭을 보여주고, TabBarView는 각 탭의 실제 내용을 보여줍니다.
현재 앱을 실행하면 다음과 같은 오류가 발생할 것입니다:
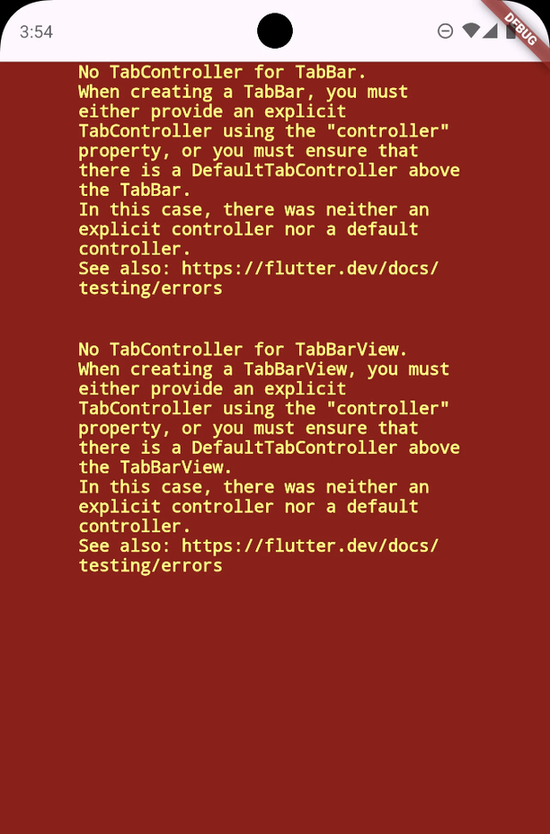
탭바에 TabController가 없습니다. 탭바를 만들 때는 "controller" 속성을 사용하여 명시적인 TabController를 제공하거나 TabBar 위에 DefaultTabController가 있도록 해야 합니다. 이 경우 explicit controller나 default controller가 둘 다 없었습니다.
이를 해결하기 위해 TabBar와 TabBarView 둘 다 동일한 TabController를 전달해야 합니다.
TabBarController에는 새로운 프레임이 그려질 때마다 TabBar를 애니메이션화하기 위해 vsync(동기를 맞출 대상)가 필요합니다.
우리는 위젯을 SingleTickerProvider mixin과 함께 상태를 섞어 TickerProvider로 만들 수 있습니다.
initState 메서드에서 TabController를 초기화하고 vsync로 this를 전달해줍니다.
import 'package:flutter/material.dart';
import 'package:material_symbols_icons/symbols.dart';
import 'package:switching_floating_action_button/switching_floating_action_button.dart';

class HomeScreen extends StatefulWidget {
  const HomeScreen({Key? key});

  @override
  State<HomeScreen> createState() => _HomeScreenState();
}

class _HomeScreenState extends State<HomeScreen>
    with SingleTickerProviderStateMixin {

  final List<int> counters = [0, 0, 0];

  late final TabController _tabController;

  @override
  void initState() {
    super.initState();
    _tabController = TabController(length: 3, vsync: this, initialIndex: 1);
  }

  @override
  Widget build(BuildContext context) {
    return Scaffold(
      appBar: AppBar(
        title: const Text('Home'),
        bottom: TabBar(
          controller: _tabController,
          tabs: const [
            Tab(icon: Icon(Symbols.bolt), text: 'Tab 1'),
            Tab(icon: Icon(Symbols.flutter), text: 'Tab 2'),
            Tab(icon: Icon(Symbols.favorite), text: 'Tab 3'),
          ],
        ),
      ),
      body: TabBarView(
        controller: _tabController,
        children: [
          for (final int c in counters)
            Center(
              child: Text(
                'You pressed the button $c times in this tab',
                style: Theme.of(context).textTheme.title!,
              ),
            ),
        ],
      ),
      floatingActionButton: FloatingActionButton(
        onPressed: () => setState(() => counters[_tabController.index]++),
        child: const Icon(Symbols.add),
      ),
    );
  }

  @override
  void dispose() {
    _tabController.dispose();
    super.dispose();
  }
}
또한 각 탭별로 별도의 카운터를 유지하기 위해 counters 리스트가 추가되었습니다.

우리 앱에는 이제 3개의 탭과 하나의 FloatingActionButton이 있습니다. 새 파일에 SwitchingFloatingActionButton을 만들어 봅시다.
SwitchingFloatingActionButton 생성
import 'package:flutter/material.dart';

class SwitchingFloatingActionButton extends StatefulWidget {
  const SwitchingFloatingActionButton({
    super.key,
    required this.animation,
    required this.builder,
    this.child,
  });

  final Animation<double> animation;
  final Widget Function(BuildContext, int, Widget?) builder;
  final Widget? child;

  @override
  State<SwitchingFloatingActionButton> createState() =>
      _SwitchingFloatingActionButtonState();
}

class _SwitchingFloatingActionButtonState
    extends State<SwitchingFloatingActionButton> {

  @override
  Widget build(BuildContext context) {
    final Animation<double> animation = widget.animation;

    return AnimatedBuilder(
      animation: animation,
      builder: (context, child) {
        return widget.builder(context, animationValue.roundToInt(), widget.child);
      },
    );
  }
}
그리고 HomeScreen의 floatingActionButton을 업데이트하세요:
SwitchingFloatingActionButton(
  animation: _tabController.animation!,
  builder: (context, i, child) => FloatingActionButton(
    onPressed: () => setState(() => counters[i]++),
    child: switch (i) {
      0 => const Icon(Symbols.add),
      1 => const Icon(Symbols.add_home),
      2 => const Icon(Symbols.add_diamond),
      _ => throw UnimplementedError(),
    },
  ),
)
현재 FAB는 많은 일을 하지 않고 있습니다. 오직 위젯.builder를 호출하고 있어요!

애니메이션 값과 오프셋 이해하기
옛 인덱스에서 새 인덱스(예: 1에서 2)로 이동하는 동안 FAB를 애니메이션화해야 합니다.
탭바가 옛 인덱스에서 새 인덱스로 애니메이트됨에 따라, TickerProvider를 사용하여 애니메이션 값이 변경됩니다 (예: 1 → 1.1 → 1.2 → … → 1.9 → 2). 이는 애니메이션 값을 사용하여 옛 인덱스를 계산할 수 있음을 의미합니다(animation.value.floor()), 그리고 애니메이션 값을 사용하여 새 인덱스를 계산할 수 있음을 의미합니다(animation.value.ceil()).
다음으로, 애니메이션 오프셋을 계산해야 합니다. 이는 옛 인덱스에서 새 인덱스까지 애니메이션의 백분율입니다.
이것은 애니메이션 값의 소수 부분에 해당합니다. 안타깝게도, dart에는 이 부분을 직접 가져오는 방법이 없지만, 소수 부분을 계산하는 데 사용할 수 있는 정수 부분을 제공하는 num.truncate() 메서드가 있습니다.
애니메이션 값에서 소수 부분을 뺀 (1.5 - 1 = 0.5) 값을 오프셋으로 설정해야 합니다.
지금까지 완성한 코드는 다음과 같습니다:
import 'package:flutter/material.dart';

class SwitchingFloatingActionButton extends StatefulWidget {
  const SwitchingFloatingActionButton({
    super.key,
    required this.animation,
    required this.builder,
    this.child,
  });

  final Animation<double> animation;
  final Widget Function(BuildContext, int, Widget?) builder;
  final Widget? child;

  @override
  State<SwitchingFloatingActionButton> createState() =>
      _SwitchingFloatingActionButtonState();
}

class _SwitchingFloatingActionButtonState
    extends State<SwitchingFloatingActionButton> {
  @override
  Widget build(BuildContext context) {
    final Animation<double> animation = widget.animation;

    return AnimatedBuilder(
      animation: animation,
      builder: (context, child) {
        final double animationValue = animation.value;
        final double offset = animationValue - animationValue.truncate();
        final int oldIndex = animationValue.floor();
        final int newIndex = animationValue.ceil();

        return widget.builder(context, animationValue.round(), widget.child);
      },
    );
  }
}
이제 변수가 설정되어 있으니 나머지는 쉬울 겁니다.
여기에 * Animation * 부분을 입력하세요.
실제 애니메이션
이전 FAB가 현재 위치에서 벗어나 새로운 FAB가 그 자리로 이동하도록 원합니다.
이 작업을 위해 Transform.translate 위젯이 최적입니다. 이 위젯은 번역해야 할 자식 위젯과 어떻게 번역해야 하는지를 나타내는 오프셋을 사용합니다.
다음과 같이 Stack을 사용하여 2개의 FAB를 표시해야 합니다:
const double translationAmount = 56;
final double animationValue = animation.value;
final double offset = animationValue - animationValue.truncate();
final int oldIndex = animationValue.floor();
final int newIndex = animationValue.ceil();

return Stack(
  alignment: Alignment.center,
  children: [
    Transform.translate(
      offset: Offset(-offset, 0) * translationAmount,
      child: widget.builder(context, oldIndex, widget.child),
    ),
    Transform.translate(
      offset: Offset(1 - offset, 0) * translationAmount,
      child: widget.builder(context, newIndex, widget.child),
    ),
  ],
);
이해를 돕기 위해 설명을 드리겠습니다:
이 스택에는 두 개의 자식이 있습니다: 우리가 이동 중인 이전 FAB(첫 번째)와 우리가 이동하고 있는 새 FAB(두 번째)입니다.
새 FAB가 마지막 자식이므로 이전 FAB보다 화면 전면에 나타납니다.
탭 컨트롤러의 오프셋이 0부터 시작하여 1까지 (애니메이션 완료) 범위 내에 있기 때문에 애니메이션 오프셋에서 번역 오프셋을 도출할 수 있습니다.
이전 FAB에서는 애니메이션 오프셋을 완전한 번역 양(애니메이션 종료 시의 전체 번역 양)과 음의 x 방향(왼쪽)으로 곱했습니다.
새 FAB에서는 오프셋을 1에서 뺀 후 값을 반전(0 → 1, 0.4 → 0.6, 1 → 0)하여 동일한 번역 양과 곱합니다.
다음 애니메이션이 생성됩니다

새로운/이전 FAB의 등장과 사라짐을 애니메이션화해야 합니다
Opacity 위젯을 사용해봅시다
final double animationValue = animation.value;
final double offset = animationValue - animationValue.truncate();
final int oldIndex = animationValue.floor();
final int newIndex = animationValue.ceil();

return Stack(
  alignment: Alignment.center,
  children: [
    Opacity(
      opacity: 1 - offset,
      child: Transform.translate(
        offset: Offset(-offset, 0) * translationAmount,
        child: widget.builder(context, oldIndex, widget.child),
      ),
    ),
    Opacity(
      opacity: offset,
      child: Transform.translate(
        offset: Offset(1 - offset, 0) * translationAmount,
        child: widget.builder(context, newIndex, widget.child),
      ),
    ),
  ],
);
기존 FAB에서 역 오프셋(1 - offset)을 사용하여 오프셋이 1일 때 기존 FAB 투명도가 0(숨겨짐)이 되고 새 FAB에서는 일반 오프셋을 사용합니다.
그리고 여기에 최종 결과가 있습니다:

Here is the full project github repo link
Challenge
Can you change a little detail to make it look like this? Comment below how would you achieve this modified version of the animation, I read all comments