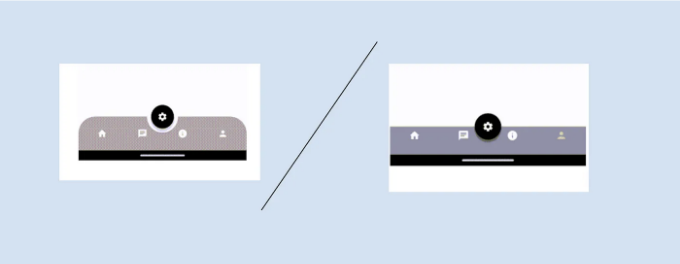
안녕하세요! 이 블로그에서는 Flutter에서 BottomNavigationBar를 구현하는 방법과 BottomNavigationBar 및 BottomAppBar 위젯을 사용하여 그들 간의 차이점을 살펴볼 것입니다.
Scaffold에 있는 bottomNavigationBar 속성은 앱 하단에 고정되어 있어 다른 버튼을 표시할 수 있습니다. BottomNavigationBar / BottomAppBar 위젯을 사용하여 아이콘이나 라벨과 함께 다른 버튼을 표시할 수 있습니다. 이를 통해 하나의 아이콘 / 라벨을 선택하고 해당하는 페이지 / UI로 빠르게 이동할 수 있습니다.
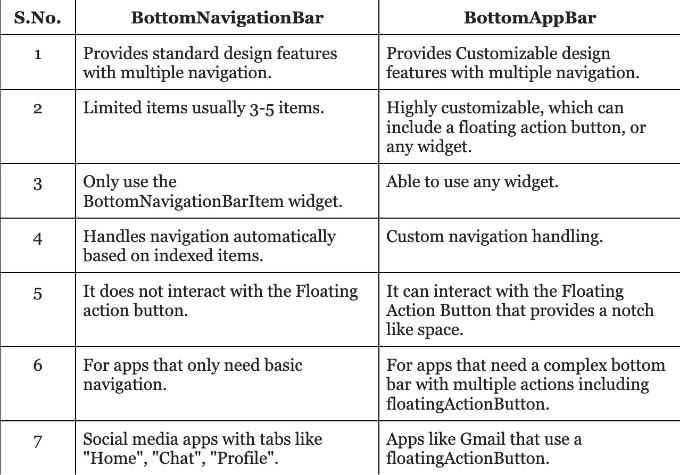
BottomNavigationBar 여기에서는 인덱스에 따라 화면을 자동으로 처리하며, 여기에서 사용할 수있는 몇 가지 속성이 있습니다:
type: BottomNavigationBarType.fixed 또는 BottomNavigationBarType.shifted. currentIndex: 앱이 시작될 때 시작 인덱스를 정의합니다. items: 아이콘과 라벨이 필수인 BottomNavigationBarItems의 리스트를 포함합니다.
BottomNavigationBar(
  type: BottomNavigationBarType.fixed,
  backgroundColor: const Color(0xff1c1f26),
  unselectedItemColor: Colors.white,
  selectedItemColor: Colors.white 54,
  currentIndex: viewModel.index,
  onTap: (value) {
    viewModel.index = value;
    viewModel.updateUI();
  },
  items: const [
    BottomNavigationBarItem(icon: Icon(Icons.home), label: ""),
    BottomNavigationBarItem(icon: Icon(Icons.chat), label: ""),
    BottomNavigationBarItem(icon: Icon(Icons.info), label: ""),
    BottomNavigationBarItem(icon: Icon(Icons.person), label: ""),
  ],
),
int index = 0;
getBottomNavigationWidget(int pos) {
  switch (pos) {
    case 0:
      return const HomeScreen();
    case 1:
      return const ChatScreen();
    case 2:
      return const AboutScreen();
    case 3:
      return const ProfileScreen();
    default:
      return const MyHomePage();
  }
}

BottomAppBar 이 곳에서는 네비게이션을 위해 화면을 개별적으로 정의해야 합니다. 다음은 유용한 속성 몇 가지입니다:
notchMargin: bottomBar과 floatingActionButton 사이에 공간을 주는 속성입니다. shape: floatingActionButton 간의 공간을 디자인하기 위해 AutomaticNotchedShape 및 CircularNotchedRectangle을 사용할 수 있습니다.
child: bottomNavigationBarItems만 사용하는 BottomNavigationBar와는 달리 다양한 종류의 위젯을 사용할 수 있습니다.
BottomAppBar( notchMargin: 10, clipBehavior: Clip.antiAlias, color: const Color(0xff1c1f26), shape: const AutomaticNotchedShape( RoundedRectangleBorder( borderRadius: BorderRadius.only( topLeft: Radius.circular(40), topRight: Radius.circular(40), ), ), RoundedRectangleBorder( borderRadius: BorderRadius.all(Radius.circular(45)), ), ), child: Padding( padding: const EdgeInsetsDirectional.symmetric(horizontal: 30), child: Row( mainAxisAlignment: MainAxisAlignment.spaceBetween, children: [ InkWell( onTap: () => HomePageViewModel(), child: const Icon( Icons.home, color: Colors.white, ), ), InkWell( onTap: () => const ChatScreen(), child: const Icon( Icons.chat, color: Colors.white, ), ), const SizedBox( width: 12, ), InkWell( onTap: () => const AboutScreen(), child: const Icon( Icons.info, color: Colors.white, ), ), InkWell( onTap: () => const ProfileScreen(), child: const Icon( Icons.person, color: Colors.white, ), ), ], ), ), ),

BottomNavigationBar와 BottomAppBar의 주요 차이점:
결론
Flutter에서 bottomNavigationBar와 bottom app bar를 사용하여 두 가지 위젯을 구현했습니다. 한 번에 아이콘/레이블을 선택하고 해당 페이지/UI를 빠르게 이동하는 기능을 활용했습니다. 이를 통해 화면이 색인을 기준으로 처리됩니다.
이 블로그가 도움이 되었다면 박수를 쳐주세요. 👏👏👏👏
❤❤ 읽어주셔서 감사합니다!!! ❤❤