(그 손가락은 정말 기이해... 그래도 이미지를 사용하기로 결정했어요...)
지도 작업을 할 때, 서로 다른 위치로 전환할 수 있는 능력, 예를 들어 사용자가 다양한 위치를 검색하면 해당 위치로 이동하는 능력은 정말 흔히 필요한 기능입니다. 또 다른 필요한 기능은 사용자가 지도를 움직일 때 지도 위치를 추적하는 것일 수 있어요.
맵을 초기화할 때 MapCameraPosition을 Binding으로 전달하면 되고, 이 위치를 읽어서 지도 위치를 가져올 수 있다고 생각할 수도 있어요. 그런데 그것만으로 충분하지 않아요!
한번 확인해 봐요!
설정
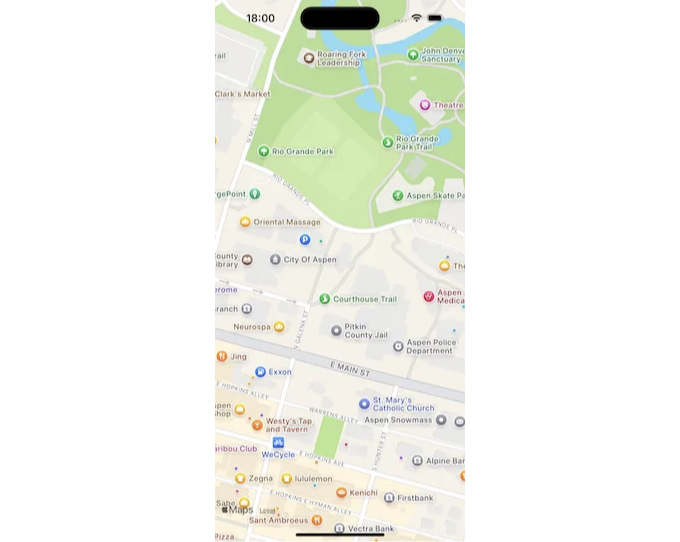
콜로라도 주 아스펜을 중심으로 초기 위치가 설정된 간단한 맵이에요.
import SwiftUI
import MapKit

private struct DemoView: View {
    static let aspen = MapCameraPosition.camera(MapCamera(
        centerCoordinate: CLLocationCoordinate2D(latitude: 39.1911, longitude: -106.817535),
        distance: 1000,
        heading: 0,
        pitch: 0
    ))

    static let shibuya = MapCameraPosition.camera(MapCamera(
        centerCoordinate: CLLocationCoordinate2D(latitude: 35.6615, longitude: 139.703),
        distance: 300,
        heading: 0,
        pitch: 0
    ))

    @State private var position: MapCameraPosition = Self.aspen

    var body: some View {
        Map(position: $position)
    }
}
우리가 같은 페이지에 있는지 확인하기 위해 앱을 빨리 실행해봐요!
위치 설정
위치 설정은 간단해요.
상상하시는 대로, 해야 할 일은 위치 상태 변수를 새 값으로 설정하는 것뿐입니다.
 Map(position: $position)
    .overlay(alignment: .top, content: {
        HStack(spacing: 16) {
            Button(action: {
                position = Self.shibuya
            }, label: {
                Text("Shibuya, Tokyo")
                    .font(.title3)
                    .foregroundStyle(.white)
                    .padding(.vertical, 4)
                    .padding(.horizontal, 8)
                    .frame(maxWidth: .infinity)
                    .background(RoundedRectangle(cornerRadius: 4).fill(.gray))

            })

            Button(action: {
                position = Self.aspen
            }, label: {
                Text("Aspen, Colorado")
                    .font(.title3)
                    .foregroundStyle(.white)
                    .padding(.vertical, 4)
                    .padding(.horizontal, 8)
                    .frame(maxWidth: .infinity)
                    .background(RoundedRectangle(cornerRadius: 4).fill(.gray))

            })
        }
        .fixedSize(horizontal: true, vertical: false)
        .padding(.all, 16)
    })
그리고 이렇게요! 시부야와 애스펜 사이를 왔다갔다 해봅시다!
이제 지도 위치를 추적하기 위해 position.change에서 position.region을 검색하기만 하면 된다고 생각할 수 있습니다!
하지만! 아니에요!
position을 출력해보면 모든 값이 nil이라는 것을 알 수 있어요...(초기화할 때를 제외하고!)
position.rect: nil
position.positionedByUser: true
position.region: nil
position.item: nil
position.camera: nil
다음 섹션으로 이동하여 지도 위치 변경을 추적하는 방법을 살펴보겠습니다!
지도 위치 변경 추적
이미 앞에서 본 대로 지도에 연결을 전달해도, 지도가 이동할 때 위치를 바로 읽을 수는 없습니다.
이곳의 핵심은 onMapCameraChange(frequency:_:) 뷰 수정자를 사용하는 것입니다. 이 수정자는 위치가 변경될 때 우리에게 알려주는데, 이는 주파수에 따라 즉시(continuous로 주파수를 전달함) 또는 이동이 종료된 후(주파수를 onEnd로 지정함)에 변경됩니다.
위에 바인딩을 사용하지 않아도 onMapCameraChange를 통해 알림을 받을 수 있습니다.
아래 코드를 추가하여 현재 지도 위치를 보여주는 오버레이를 단순히 확인해 보겠습니다.
private struct DemoView: View {
    // ...

    @State private var centerCoordinate: CLLocationCoordinate2D? = Self.aspen.camera?.centerCoordinate

    var body: some View {
        Map(position: $position)
            .onMapCameraChange(frequency: .continuous) { context in
                self.centerCoordinate = context.region.center
            }
            .overlay(alignment: .bottomLeading, content: {
                if let centerCoordinate = centerCoordinate {
                    Text("\(centerCoordinate.latitude), \(centerCoordinate.longitude)")
                        .font(.title3)
                        .foregroundStyle(.white)
                        .padding(.vertical, 4)
                        .padding(.horizontal, 8)
                        .background(RoundedRectangle(cornerRadius: 4).fill(.gray))
                        .padding(.all, 16)
                }
            })
            // ...
    }
}

아래 왼쪽 모서리의 좌표가 지도를 움직일 때마다 업데이트되는 걸 볼 수 있어요!
읽어주셔서 감사합니다!
오늘은 여기까지입니다!
즐거운 추적 되세요!