Note: 저희가 HTML5 캔버스의 모든 학습을 활용하여 최종적으로 태양계 애니메이션을 만들어 보았습니다. 페이지 맨 끝으로 이동하여 동일한 것을 보세요... 정말 매혹적입니다.
HTML5 Canvas란?
- 동적이고 스크립팅 가능한 2D 모양과 비트맵 이미지의 렌더링을 가능하게 하는 그래픽 요소입니다. 기본 사용 사례에는 그래픽, 게임, 시각화, 애니메이션이 포함됩니다.
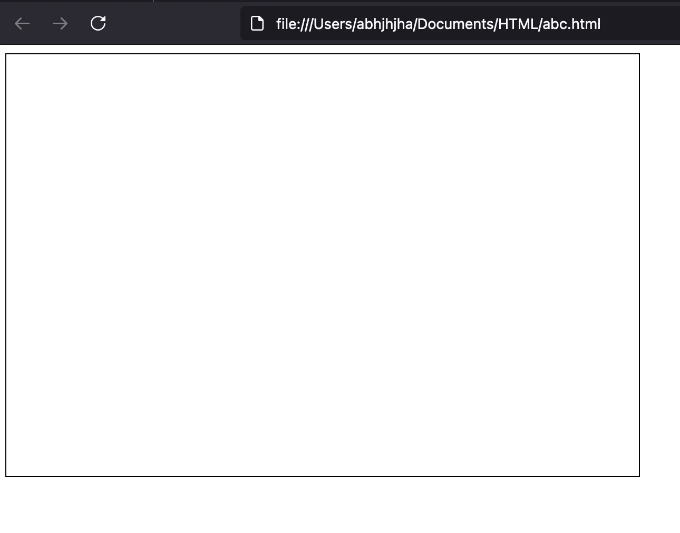
HTML5 캔버스 설정
<!DOCTYPE html>
<html lang="en">
<head>
    <meta charset="UTF-8">
    <meta name="viewport" content="width=device-width, initial-scale=1.0">
    <title>HTML5 캔버스 튜토리얼</title>
    <style>
        canvas {
            border: 1px solid black;
        }
    </style>
</head>
<body>
    <canvas id="myCanvas" width="600" height="400"></canvas>
    <script src="script.js"></script>
</body>
</html>
canvas: HTML 문서 내에 캔버스 요소를 정의합니다.- id="myCanvas": 캔버스에 JavaScript에서 참조하기 위한 식별자를 할당합니다.
- width="500": 캔버스의 너비를 설정합니다.
- height="400": 캔버스의 높이를 설정합니다. 출력 :
캔버스 API에 접근하기
const canvas = document.getElementById('myCanvas');
const ctx = canvas.getContext('2d');
- document.getElementById(
myCanvas): ID를 통해 캔버스 요소를 가져옵니다. - canvas.getContext(
2d): 2D 그리기 컨텍스트를 가져옵니다. 이 컨텍스트는 모양, 텍스트, 이미지 등을 그릴 때 사용됩니다.
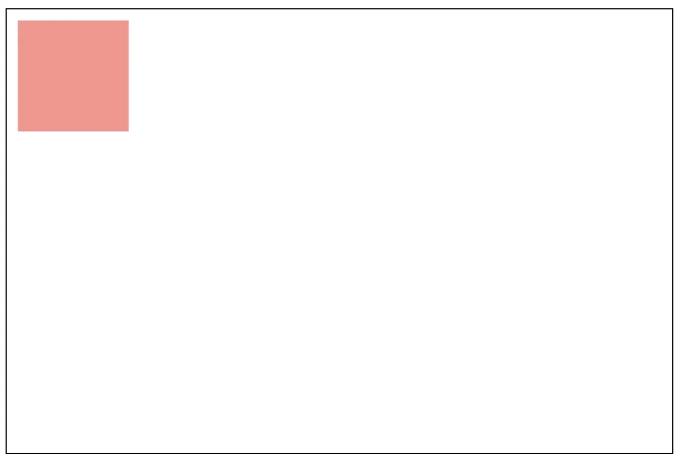
기본 그리기
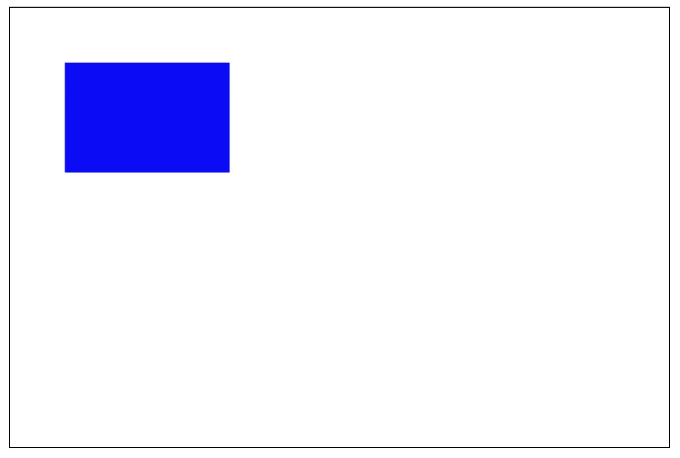
직사각형 그리기
ctx.fillStyle = 'blue';
ctx.fillRect(50, 50, 150, 100);  // x, y, width, height
- fillStyle: 도형 내부에 사용할 색상이나 스타일을 설정합니다.
- fillRect(x, y, width, height): 지정된 너비와 높이로 위치 (x, y)에 채워진 직사각형을 그립니다.
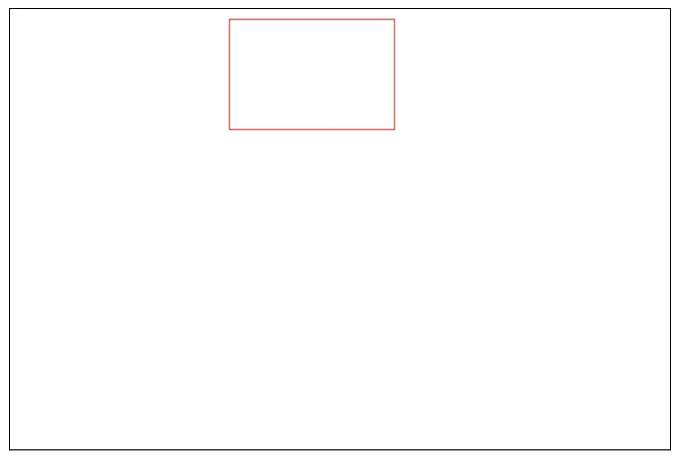
사각형 테두리 그리기:
ctx.strokeStyle = 'red'; // 색상 설정
ctx.strokeRect(200, 10, 150, 100); // 사각형 테두리 그리기
- strokeStyle: 도형의 선에 사용할 색상이나 스타일을 설정합니다.
- strokeRect(x, y, width, height): 지정된 너비와 높이로 위치 (x, y)에 사각형 윤곽선을 그립니다.
투명 사각형:
clearRect(x, y, width, height): 지정한 직사각형 영역을 지워서 투명하게 만듭니다.
ctx.clearRect(20, 20, 100, 100); // 캔버스의 일부를 지웁니다
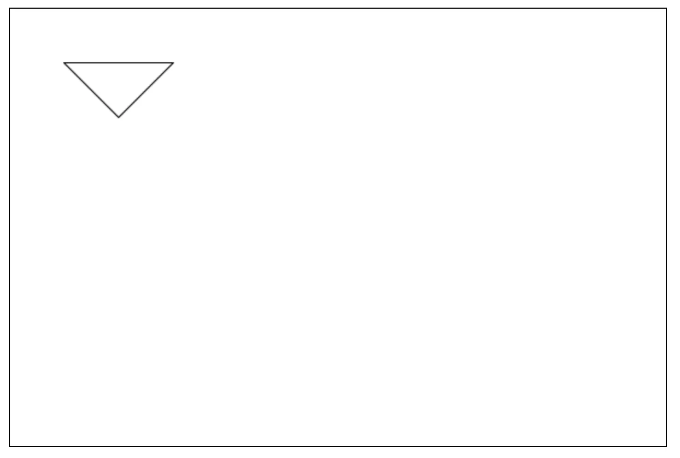
경로
시작 포인트:
ctx.beginPath(); // 새 경로 시작
ctx.moveTo(50, 50); // 시작 지점으로 이동
ctx.lineTo(150, 50); // (150, 50)까지 선 그리기
ctx.lineTo(100, 100); // (100, 100)까지 선 그리기
ctx.closePath(); // 경로 닫기
ctx.stroke(); // 획 적용
- beginPath(): 새 경로를 시작하거나 현재 경로를 재설정합니다.
- moveTo(x, y): 그리지 않고 새 위치로 펜을 이동시킵니다.
- lineTo(x, y): 현재 위치에서 지정된 좌표로 선을 그립니다.
- closePath(): 시작점으로 선을 다시 그어 경로를 닫습니다.
- stroke(): 경로의 윤곽을 그립니다.
호와 원
ctx.beginPath();
ctx.arc(200, 200, 50, 0, Math.PI * 2); // 전체 원 그리기
ctx.fillStyle = 'green';
ctx.fill(); // 원 채우기
arc(x, y, radius, startAngle, endAngle): 호 또는 원을 그립니다.
- x, y: 원의 중심
- radius: 원의 반지름
- startAngle, endAngle: 라디안으로 시작 각도와 끝 각도를 정의합니다.
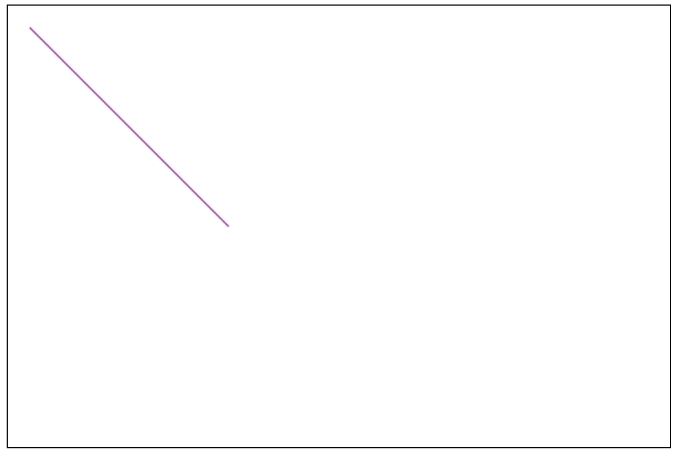
선
ctx.beginPath();
ctx.moveTo(20, 20);
ctx.lineTo(200, 200);
ctx.strokeStyle = 'purple';
ctx.stroke(); // 선 그리기
- moveTo(x, y): 펜을 시작점으로 이동합니다.
- lineTo(x, y): 지정된 좌표로 선을 그립니다.
텍스트
텍스트 그리기
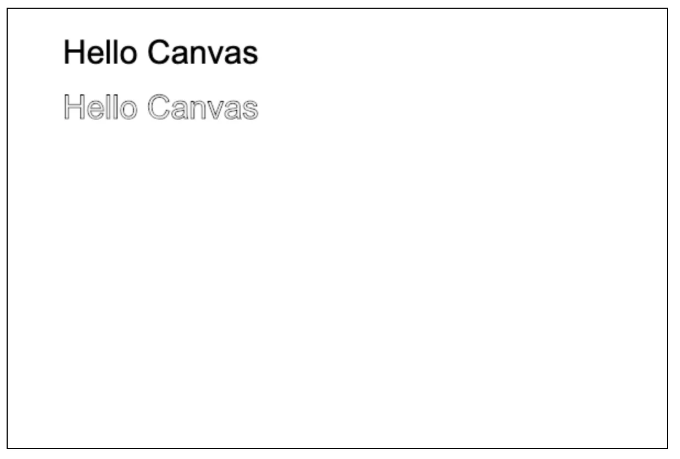
기본 텍스트:
ctx.font = '30px Arial'; // 폰트 스타일과 크기 설정
ctx.fillText('안녕 캔버스', 50, 50); // 채워진 텍스트 그리기
ctx.strokeText('안녕 캔버스', 50, 100); // 윤곽 텍스트 그리기
- 글꼴: 글꼴 크기 및 종류 설정
- fillText(text, x, y): 지정된 좌표에 채워진 텍스트를 그립니다.
- strokeText(text, x, y): 텍스트의 윤곽을 그립니다.
텍스트 속성:
ctx.font = 'italic 20px Verdana'; // 글꼴 스타일과 크기
ctx.textAlign = 'center'; // 텍스트 정렬
ctx.textBaseline = 'middle'; // 텍스트 기준선
ctx.fillText('가운데 정렬', canvas.width / 2, canvas.height / 2); // 가운데 정렬된 텍스트 그리기
- textAlign: 텍스트의 가로 정렬을 설정합니다.
- textBaseline: 텍스트의 세로 정렬을 설정합니다.

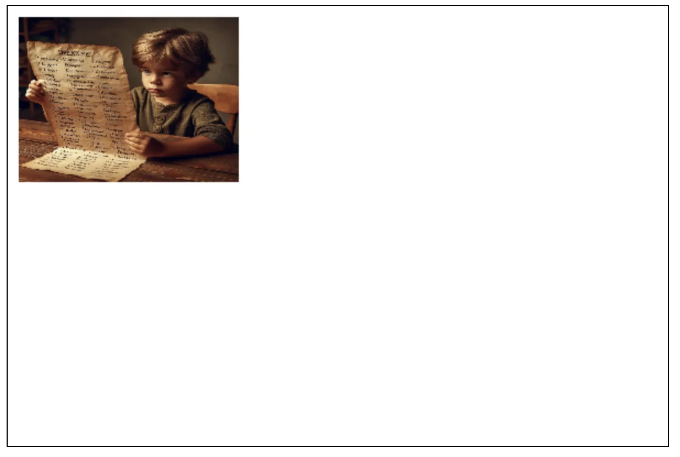
이미지
이미지 그리기
이미지 로드 및 그리기:
var img = new Image();
img.src = 'path/to/image.jpg';
img.onload = function() {
  ctx.drawImage(img, 10, 10, 200, 150); // (10,10) 위치에 너비 200, 높이 150으로 이미지 그리기
};
- Image(): 새 이미지 객체를 생성합니다.
- img.src: 이미지 소스 URL을 설정합니다.
- img.onload: 이미지가 완전히 로드된 후에 그려지도록 합니다.
이미지 슬라이싱
이미지 일부를 그립니다:
ctx.drawImage(img, 50, 50, 100, 100, 10, 10, 50, 50); // 소스 및 대상 사각형
drawImage(img, sx, sy, sWidth, sHeight, dx, dy, dWidth, dHeight): 이미지의 일부를 그립니다.
그라디언트와 패턴
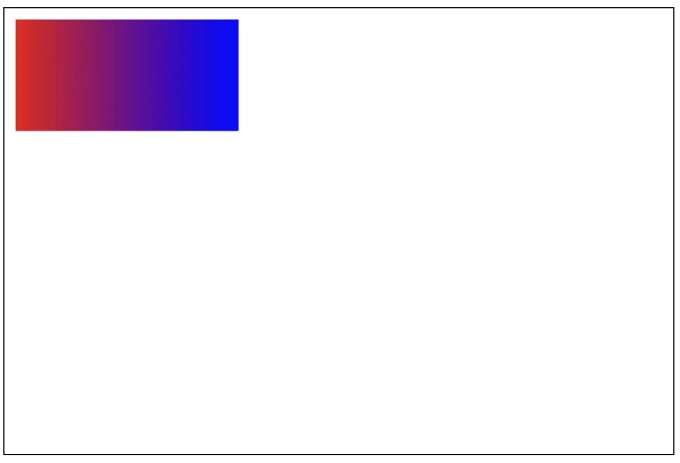
선형 그라디언트
그라디언트 생성 및 사용:
var gradient = ctx.createLinearGradient(0, 0, 200, 0); // (0,0)에서 (200,0)으로 그라디언트 생성
gradient.addColorStop(0, 'red'); // 시작 색상
gradient.addColorStop(1, 'blue'); // 끝 색상
ctx.fillStyle = gradient;
ctx.fillRect(10, 10, 200, 100); // 그라디언트로 사각형 채우기
- createLinearGradient(x0, y0, x1, y1): 선형 그라데이션을 만듭니다.
- addColorStop(offset, color): 그라데이션에 대한 색상 중지점을 정의합니다.
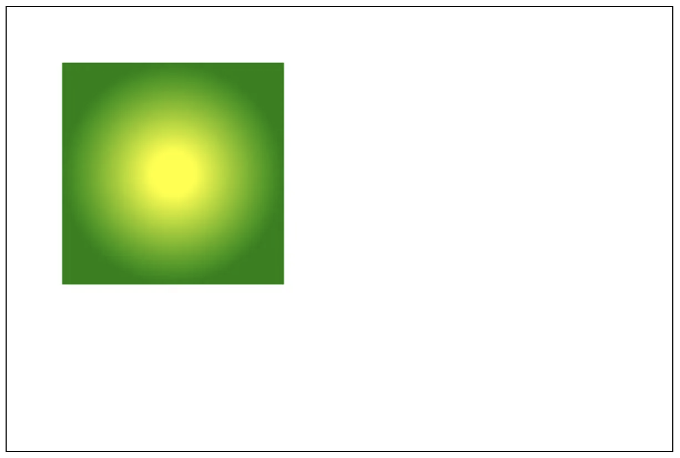
원형 그라데이션
그라데이션 생성 및 사용법:
var radialGradient = ctx.createRadialGradient(150, 150, 20, 150, 150, 100); // 내부와 외부 원
radialGradient.addColorStop(0, 'yellow'); // 내부 색상
radialGradient.addColorStop(1, 'green'); // 외부 색상
ctx.fillStyle = radialGradient;
ctx.fillRect(50, 50, 200, 200); // 방사형 그라데이션으로 사각형 채우기
- createRadialGradient(x0, y0, r0, x1, y1, r1): 방사형 그라데이션을 생성합니다.
- 태양광과 빛나는 효과를 만듭니다.
- 원형 전환에 유용합니다.
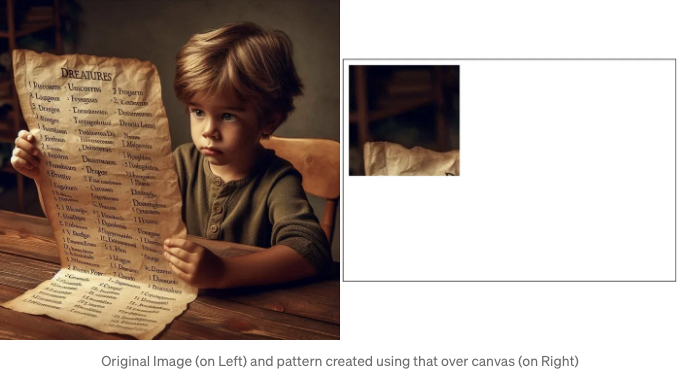
패턴들
패턴 생성 및 사용하기:
var patternImg = new Image();
patternImg.src = 'path/to/pattern.jpg';
patternImg.onload = function() {
  var pattern = ctx.createPattern(patternImg, 'repeat'); // 패턴 생성
  ctx.fillStyle = pattern;
  ctx.fillRect(10, 10, 200, 200); // 패턴으로 사각형 채우기
};
createPattern(image, repetition): 이미지를 사용하여 패턴 생성하기.
변환
이동, 회전, 크기 조절
이동:
ctx.translate(100, 100); // 원점을 (100,100)으로 이동
ctx.fillRect(0, 0, 50, 50); // 새 원점에서 사각형 그리기
ctx.translate(-100, -100); // 원점을 원래대로 이동
translate(x, y): 캔버스의 원점을 새 위치로 이동합니다.
회전:
ctx.translate(150, 150); // 회전 중심으로 이동
ctx.rotate(Math.PI / 4); // 45도 회전
ctx.fillRect(-50, -50, 100, 100); // 사각형 중앙에 그리기
ctx.rotate(-Math.PI / 4); // 되돌리기
ctx.translate(-150, -150); // 원점 이동
rotate(angle): 캔버스를 원점을 중심으로 회전시킵니다.
이 계측 파일 형식을 Markdown 형식으로 변경해주세요.
| Scale: | |
|---|---|
ctx.scale(2, 2); | // Double the size |
ctx.fillRect(10, 10, 50, 50); | // Draw scaled rectangle |
ctx.scale(0.5, 0.5); | // Revert scaling |
scale(x, y): 지정된 배수에 따라 캔버스의 크기를 조정합니다.
Compositing and Global Properties
Global Alpha
투명도 설정:
ctx.globalAlpha = 0.5; // 투명도를 90%로 설정
ctx.fillStyle = 'rgba(255,0,0,1)'; // 반투명 빨간색
ctx.fillRect(10, 10, 100, 100);
globalAlpha: 그리기 작업의 투명도 수준을 설정합니다.
- 투명도와 레이어링과 같은 효과를 만드는 데 유용합니다.
- 모든 모양과 텍스트에 적용할 수 있습니다.
전역 복합 연산
복합 모드 설정하기:
ctx.globalCompositeOperation = 'multiply'; // 블렌드 모드
ctx.fillStyle = 'blue';
ctx.fillRect(10, 10, 100, 100);
ctx.globalCompositeOperation = 'source-over'; // 기본값으로 재설정
globalCompositeOperation: 중첩된 요소에 대한 합성 작업 유형을 설정합니다.
- 모양과 이미지가 함께 어떻게 혼합되는지 제어합니다.
- 창의적인 효과를 위한 다양한 블렌드 모드를 지원합니다.
애니메이션
기본 애니메이션 루프
requestAnimationFrame을 사용합니다:
function draw() {
  ctx.clearRect(0, 0, canvas.width, canvas.height); // 캔버스 지우기
  ctx.beginPath();
  ctx.arc(100, 100, 50, 0, Math.PI * 2);
  ctx.fillStyle = 'red';
  ctx.fill();
  requestAnimationFrame(draw); // 반복
}
draw();
requestAnimationFrame(callback): 애니메이션의 다음 프레임을 예약합니다.
- 원활한 애니메이션을 만드는 효율적인 방법.
- 자동으로 디스플레이 주사율과 동기화됩니다.
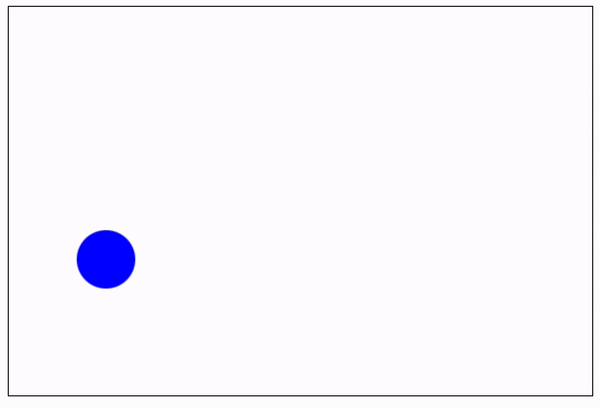
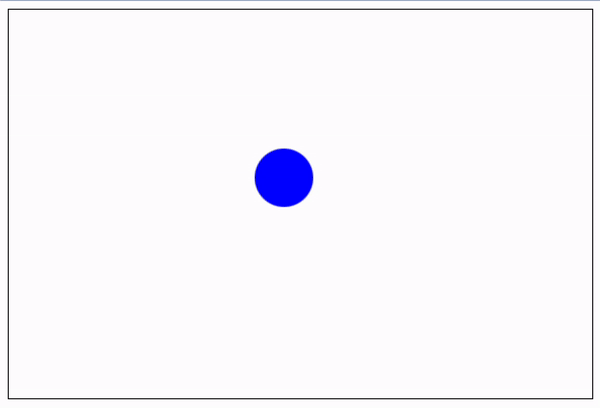
변수를 사용한 애니메이션
원 움직임 애니메이션:
var x = 50;
var y = 50;
var dx = 2;
var dy = 2;

function animate() {
  ctx.clearRect(0, 0, canvas.width, canvas.height);
  ctx.beginPath();
  ctx.arc(x, y, 30, 0, Math.PI * 2);
  ctx.fillStyle = 'blue';
  ctx.fill();

  x += dx;
  y += dy;

  if (x + 30 > canvas.width || x - 30 < 0) dx = -dx;
  if (y + 30 > canvas.height || y - 30 < 0) dy = -dy;

  requestAnimationFrame(animate);
}
animate();
- 이동 변수 (x, y, dx, dy): 애니메이션된 객체의 위치와 속도를 제어합니다.
- 충돌 감지: 캔버스 가장자리에 도달할 때 방향을 바꿉니다.
이벤트
마우스 이벤트
클릭 처리:
canvas.addEventListener('click', function(event) {
  var rect = canvas.getBoundingClientRect();
  var x = event.clientX - rect.left;
  var y = event.clientY - rect.top;
  ctx.fillStyle = 'green';
  ctx.fillRect(x - 10, y - 10, 20, 20); // 클릭한 위치에 사각형 그리기
});
- addEventListener(
click, callback): 마우스 클릭 이벤트를 위한 이벤트 리스너 추가 - getBoundingClientRect(): 캔버스 위치를 뷰포트를 기준으로 가져옴
- event.clientX와 event.clientY: 마우스 좌표 가져오기
- 사용자 입력에 기반한 대화형 그래픽을 구현할 수 있음
- 대화형 애플리케이션과 게임에 활용 가능
드래깅
드래그 앤 드롭:
var isDragging = false;
var dragStartX, dragStartY;

canvas.addEventListener('mousedown', function(event) {
  isDragging = true;
  dragStartX = event.offsetX;
  dragStartY = event.offsetY;
});

canvas.addEventListener('mousemove', function(event) {
  if (isDragging) {
    var x = event.offsetX;
    var y = event.offsetY;
    ctx.clearRect(0, 0, canvas.width, canvas.height); // 캔버스 지우기
    ctx.beginPath();
    ctx.arc(x, y, 30, 0, Math.PI * 2);
    ctx.fillStyle = 'blue';
    ctx.fill();
  }
});

canvas.addEventListener('mouseup', function() {
  isDragging = false;
});
- mousedown, mousemove, mouseup: 마우스 드래그 이벤트를 처리합니다.
- isDragging: 마우스가 눌렸는지 여부를 추적하는 부울 값입니다.
- 캔버스 내에서 드래그 앤 드롭 상호작용을 활성화합니다.
- 사용자가 그래픽을 조작해야 하는 응용프로그램에 유용합니다.
Advanced Techniques
Clipping Regions
Create Clipping Path:
ctx.beginPath();
ctx.arc(150, 150, 100, 0, Math.PI * 2);
ctx.clip(); // 클리핑 영역을 설정합니다
ctx.clearRect(0, 0, canvas.width, canvas.height); // 원 밖의 모든 것을 지웁니다
- clip(): 그리기 작업이 발생할 클리핑 영역을 정의합니다.
- 마스크 또는 제약된 그리기 영역을 생성하는 데 유용합니다.
- 복잡한 클리핑 모양을 지원합니다.
오프스크린 캔버스
성능을 위한 오프스크린 캔버스 사용:
var offscreenCanvas = document.createElement('canvas');
offscreenCanvas.width = 200;
offscreenCanvas.height = 200;
var offscreenCtx = offscreenCanvas.getContext('2d');
offscreenCtx.fillStyle = 'yellow';
offscreenCtx.fillRect(0, 0, 200, 200);

// Draw from offscreen canvas
ctx.drawImage(offscreenCanvas, 10, 10);
document.createElement('canvas'): 오프스크린 캔버스 요소를 생성합니다.drawImage(): 오프스크린 캔버스에서 내용을 시각적 캔버스에 그립니다.
장점:
- 성능에 영향을 미치지 않고 복잡한 그림이나 이미지 처리에 사용할 수 있습니다.
- 내용을 미리 렌더링하는 데 유용합니다.
보너스 콘텐츠
지금까지 배운 모든 내용을 활용하여 특별한 그림을 그려봅시다.
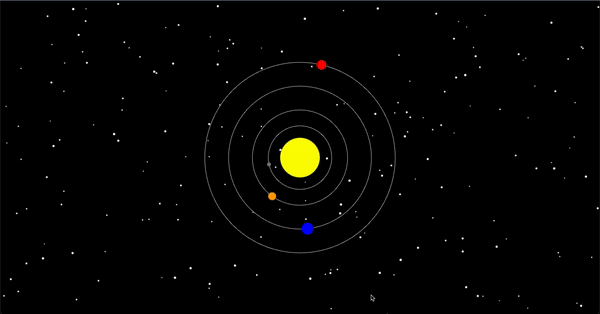
위 다이어그램은 HTML5를 사용하여 캔버스 위에 그려졌습니다.
아래는 동일한 내용에 대한 코드입니다:
HTML 파일 (예: abc.html)
<!DOCTYPE html>
<html lang="en">
<head>
    <meta charset="UTF-8">
    <meta name="viewport" content="width=device-width, initial-scale=1.0">
    <title>HTML5 Canvas Tutorial</title>
    <style>
        body {
            margin: 0;
            overflow: hidden;
            background-color: #000;
        }
        canvas {
            display: block;
        }
    </style>
</head>
<body>
    <canvas id="myCanvas"></canvas>
    <script src="script.js"></script>
</body>
</html>
연결된 JS 파일 (script.js)
// 캔버스 및 컨텍스트 설정
const canvas = document.getElementById('myCanvas');
const ctx = canvas.getContext('2d');

canvas.width = window.innerWidth;
canvas.height = window.innerHeight;

// 속성 정의
const sun = {
    x: canvas.width / 2,
    y: canvas.height / 2,
    radius: 50,
    color: 'yellow'
};

const planets = [
    { distance: 80, radius: 5, color: 'gray', angle: 0, speed: 0.02 }, // 수성
    { distance: 120, radius: 10, color: 'orange', angle: 0, speed: 0.015 }, // 금성
    { distance: 180, radius: 15, color: 'blue', angle: 0, speed: 0.01 }, // 지구
    { distance: 240, radius: 12, color: 'red', angle: 0, speed: 0.008 } // 화성
];

// 백그라운드 별 정의
const stars = [];
const numStars = 200;

// 별 초기화
function initStars() {
    for (let i = 0; i < numStars; i++) {
        stars.push({
            x: Math.random() * canvas.width,
            y: Math.random() * canvas.height,
            size: Math.random() * 2 + 1,
            speed: Math.random() * 0.5 + 0.1
        });
    }
}

// 별 배경 그리기 함수
function drawStars() {
    ctx.fillStyle = 'white';
    stars.forEach(star => {
        ctx.beginPath();
        ctx.arc(star.x, star.y, star.size, 0, Math.PI * 2);
        ctx.fill();
    });
}

// 별 위치 업데이트 함수
function updateStars() {
    stars.forEach(star => {
        star.y += star.speed;
        if (star.y > canvas.height) {
            star.y = 0;
            star.x = Math.random() * canvas.width;
        }
    });
}

// 태양 그리기 함수
function drawSun() {
    ctx.beginPath();
    ctx.arc(sun.x, sun.y, sun.radius, 0, Math.PI * 2);
    ctx.fillStyle = sun.color;
    ctx.fill();
}

// 행성 궤도 그리기 함수
function drawOrbit(planet) {
    ctx.beginPath();
    ctx.arc(sun.x, sun.y, planet.distance, 0, Math.PI * 2);
    ctx.strokeStyle = 'white';
    ctx.lineWidth = 1;
    ctx.stroke();
}

// 행성 그리기 함수
function drawPlanet(planet) {
    const x = sun.x + planet.distance * Math.cos(planet.angle);
    const y = sun.y + planet.distance * Math.sin(planet.angle);

    ctx.beginPath();
    ctx.arc(x, y, planet.radius, 0, Math.PI * 2);
    ctx.fillStyle = planet.color;
    ctx.fill();
}

// 애니메이션 루프
function animate() {
    ctx.clearRect(0, 0, canvas.width, canvas.height);

    // 배경 별 그리기
    drawStars();
    updateStars();

    drawSun();

    planets.forEach(planet => {
        drawOrbit(planet); // 행성 이전에 궤도 그리기
        planet.angle += planet.speed; // 각도 업데이트
        drawPlanet(planet);
    });

    requestAnimationFrame(animate);
}

// 별 초기화 및 애니메이션 시작
initStars();
animate();
스택데믹 🎓
끝까지 읽어 주셔서 감사합니다. 떠나시기 전에:
- 작가를 클로밍하고 팔로우해 주시면 감사하겠습니다! 👏
- 저희를 팔로우해 주세요 X | LinkedIn | YouTube | Discord
- 다른 플랫폼에서도 저희를 만나보세요: In Plain English | CoFeed | Differ
- 스택데믹닷컴에서 더 많은 콘텐츠를 만나보세요